Laundry Room Bling

May 11, 2011

I'm not really a girly-girl, but when Craig asked me to pick out the hardware for the laundry room, I knew exactly what I wanted: crystal knobs and library drawer pulls.  As you might have guessed, we're really big buy-now-install-later* kind of people.  So as usual, we headed over to Home Depot a few weeks ago to buy the hardware and then ended up tossing them into a random bucket in the basement until installation day.

Well friends, that day was today.  Here's what the cabinets look like now that Craig is finished with them:


And few close-ups of the knobs and pulls since I love them so much (almost as much as the guy who installed them):


{ Don't mind the drywall dust making an appearance in this shot.  I'm serious when I say we have it all over the house. }

I wasn't sure how the library pulls would look on the Adel drawers, but they look pretty darn good:


And if you don't like where they're placed, "it's too late now" (as dad would say).

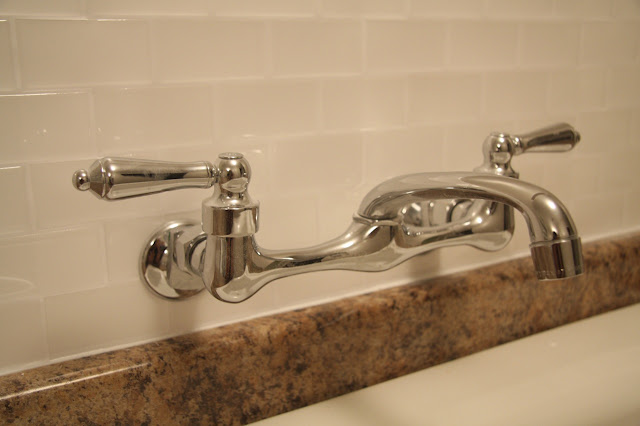
If you take a really close look at the picture above, you'll see a little more bling in upper right-hand corner.  Yes, the faucet and backsplash have  finally been installed!


We've had the sink in for a while, but I realized that I hadn't taken a picture of it yet.  It is the deepest sink I've ever seen.  I'm really looking forward to finally being able to handwash clothes (and future kiddos) in this thing.

I love this room: 


We only have a couple of things left on the to-do list:
  • install a floor transition;
  • install the window and door casing;
  • install the baseboards;
  • build a washer/dryer enclosure (like this minus the marble) and a hinged shelf to cover the taps above the washer;
  • sew a cafe curtain;
  • finish the fridge nook;
  • hack an ironing board;
  • build a drying rack;
  • install the TV; and
  • add some pretty accessories.
Yes, the list has grown a bit from before.  Our mission is to complete everything on this list by the end of May.  I may have to use up some more of my vacation days...


* We do not endorse doing this, but we had been burned in past by not buying something when we should have.  It turns out that although we are able to guarantee that we get what we want using this method, it's a heck of a lot more expensive to do it this way.  The faucet is now $50 less that what we paid, and the cabinet doors and drawer fronts are also cheaper now than when we got them.  Damned if you don't, damned if you do I guess.  Sigh.

Spring Has (Finally) Sprung

May 9, 2011

With above zero temperatures over the last few weeks, I think it's safe to say that spring in E-town has finally arrived.  We've been rocking the "cranberry wreath" from Canadian Tire every Christmas since we moved in (for a grand total of two Christmases):


And that very same wreath had been hanging proudly on our front door up until this past weekend as evidenced in the photo below:

{ Yes, this was up until Friday, May 6, 2011.  Oops, I really need to touch-up paint. }

I just wasn't ready to take it down until I was absolutely sure that we were done with the snow.  But since we were hosting a Mother's Day brunch for my mom yesterday, I thought it was about time to take it down.  But I really wanted to have something on the door for a bit of colour and after a quick Google search, I came up with this wreath as my inspiration.  After a stop at Michael's (with my trusty 25% off coupon) to gather up all of my supplies, I was raring to go:

We opted for a straw wreath form since the foam one was a bit pricey (and by pricey I mean $15).  The wreath we brought home wasn't actually wrapped like you see above.  It was just a big ol' circle of straw.  Craig came up with the idea of wrapping it up in plastic wrap to create a smooth surface since he knew I would be tearing my hair out while trying to keep the straw bits from showing through the yarn.  Just like in the inspiration wreath, we went with white yarn, and grey, pink and fuschia felt squares for the flowers.  In the end, we didn't end up using the embroidery floss or needles since I decided I didn't want it looking exactly like the inspiration wreath, so they'll be going back for a refund (more money saved...always a good thing!).

I won't bore you with the details, but basically I spent a few hours wrapping the wreath form with the white yarn and making felt flowers a la this tutorial.  Here's what I finally ended up with:


It turned out a lot better than I had expected!  I have a feeling I'll be making a few more of these over the next few months...

Revealed: Dining Room

May 4, 2011

Now that the chandelier is finally done, it's time to show a good before-and-after in progress.  Here's what the dining room looked like when we were getting our inspection done:


We'd still like to get a hutch/china cabinet for this room (preferably something super ugly that we can redo), but for now, we like it just the way it is.  And yes, we are vinyl tablecloth people.  At least until the kids are able to eat without spillage. 

PS: How awesome is the previous owner's dining room set?  A cabinet like that would be perfect to fix up!  And I love the chair backs too.  Hopefully I can score something similar on Kijiji.

Laundry Room Flooring

May 3, 2011

We're on a roll with ticking off items on our to-do list!  Craig was busy tonight finishing up the flooring in the laundry room.  I think he did a fantastic job:


The room is really starting to come together!  We still have to do some touch up painting, finish off the trim work, add the backsplash, install the faucet and attach the hardware.  Then we I get to do the fun stuff: sew a curtain, hack an ironing board, make a drying rack, add some fun accessories, and build a top with a shelf to hide the knobs above the washer and dryer.


What do you think of the rugs?  They really add some warmth to the room (and are great for keeping our feet warm!).

Now that I'm officially on Pinterest, I'll have to start collecting some inspiration photos for this space!

No. More. Circles.

Tonight I was determined to finish at least one project.  So after exactly three weeks, two boxes of wax paper, seven sheets of parchment paper, two spools of thread and a lot of patience, we finally finished the chandelier!  Here it is:

And now with a bit more detail:


They're not the greatest pictures since I'm taking them in the evening (plus we use a blasted CFL light which makes my white balance all wonky but ensures that our house doesn't burn down), but you get the idea.  We probably made over 3,000 circles (seriously).  And I honestly thought we would only need 300.  We definitely became more efficient in the whole iron-cut-punch-sew-hang process at the end.  I've got some good tips on how to make it less frustrating if you plan on tackling this project yourself!